What this guide helps you do
Build a restaurant menu with categories and items, set readable descriptions and prices, and understand the difference between hiding, making unavailable, and deleting an item.
Before you start
Use Manage inventory permission in a restaurant store. Decide the categories and prices first. A restaurant menu has category → item; it does not use nested subcategories.
Where to find it
Partner → Menu. On a phone use the Menu tab or More. Workspace Inventory and the Visual Editor's catalog panel link you into Partner for managed stores.
Step by step
-
Open Menu and type a category name in New category, then choose Add category.
-
Use the category's add-item action to open New item/product. Confirm the selected Category.
-
Enter Name and a helpful Description. Add Photos or select a fallback Icon if the control is offered.
-
For a simple item, enter its Base price in the store currency. If sizes carry different full prices, configure a Variant group instead of adding the full price twice.
-
Select Food type where offered, such as vegetarian, non-vegetarian, or egg. Add Tags and a short Badge label/color when useful.
-
Configure Variants and Add-ons if customers need choices. Review any shared-group warning before editing an attached group.
-
Choose Save changes and wait for success. The item should appear in the correct category without needing a design-editor save.
-
Use category/item reorder controls to change display order. Use Search items to find a long menu's item by name or relevant tags.
-
For a temporary shortage, use availability/snooze. To remove an item from the storefront, use the appropriate visibility control. Delete only when you intend to remove that item and have read the confirmation.
-
Open the public menu and check the name, description, image, starting price, and choices on a phone.
Understand the choices
-
Price is a customer-facing amount in the store currency. A restaurant variant group supplies the item's full base price; add-ons add extras to each unit.
-
Food type, tags, and badges describe the item. A badge does not automatically create a promotion or alter the price.
-
Visibility decides whether customers see the item. Availability decides whether they can order an otherwise visible item.
-
Deleting a category can affect the products inside it. Read the exact confirmation and use visibility/availability for a temporary operational change.
Was price is the optional crossed-out comparison price; it does not create a discount code or promotion. Leave it blank when there is no accurate comparison price.
Check the result
The public menu follows the category/item order and shows the saved details. Choosing a variant and extras produces the expected per-unit price, while old orders retain their earlier snapshots.
If something goes wrong
-
Save focuses an error: correct the required name/category/price or option field, then retry; do not close the draft.
-
The item is missing: check product/category visibility, dayparts, availability, and the correct store.
-
A shared group is read-only: use Edit for all items only when you intend to change every attached item, or attach a separate group.
-
Inventory seems read-only: managed catalog editing belongs in Partner, not the workspace's legacy Inventory screen.
Screenshots
These screenshots use demonstration data. Your names, amounts and available controls may differ. Current values on your own screen take priority.
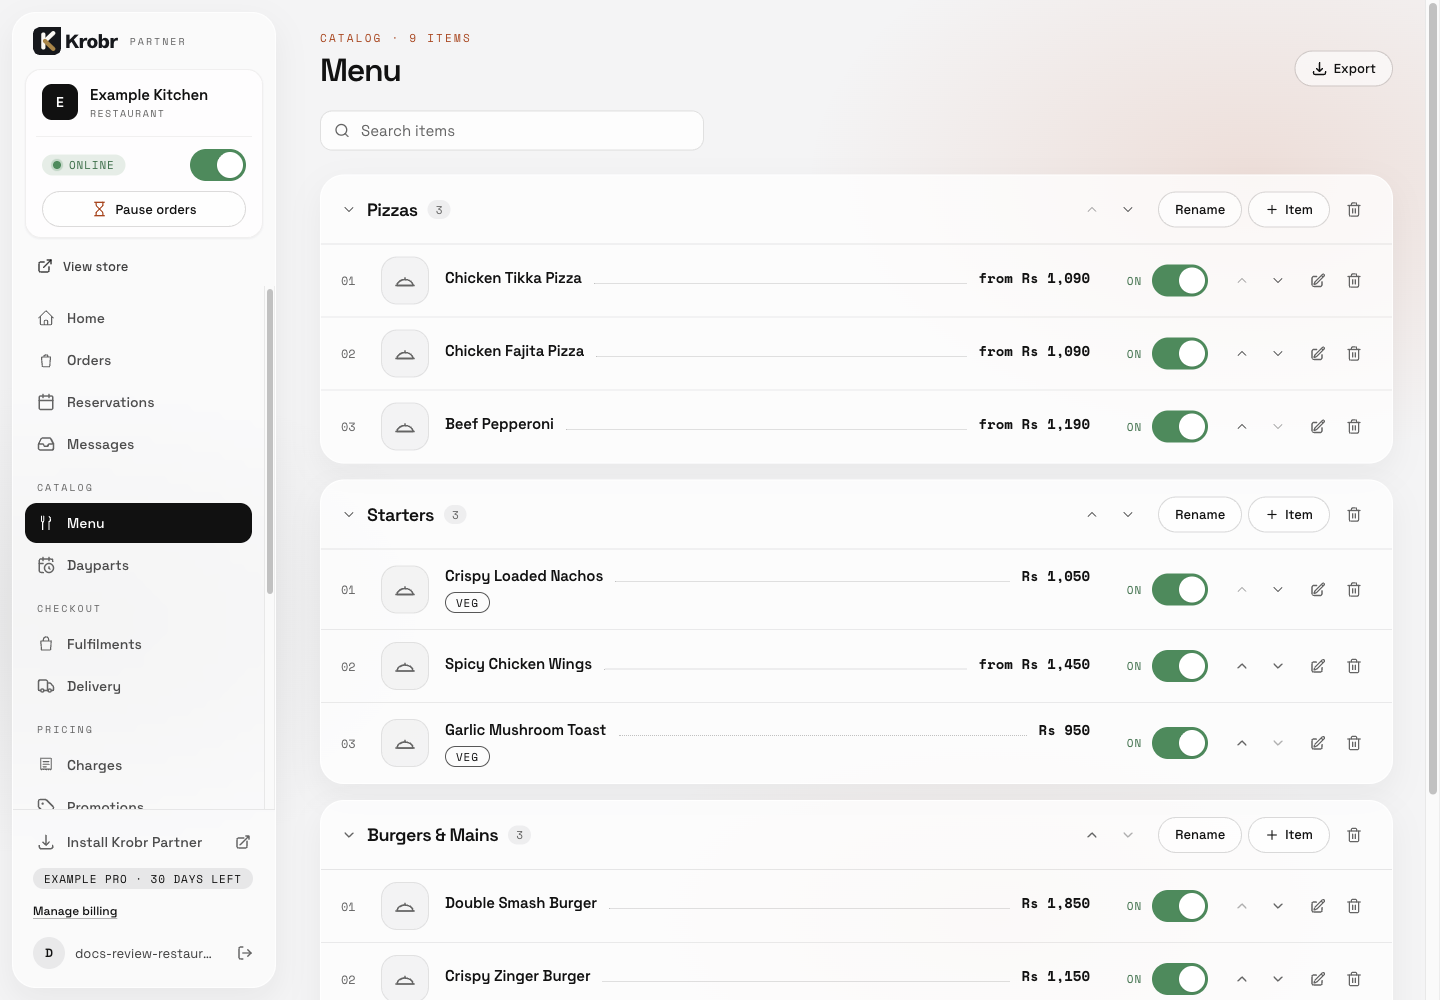
Add, edit, and organize your restaurant menu: find the controls in this example screen and follow the numbered instructions above. Retained English example from 13 October 2026. The Partner account area now also includes Language, which is not shown in this dated sidebar; follow the numbered steps for the current screen.
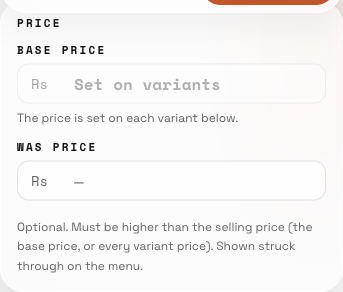
Add, edit, and organize your restaurant menu: find the controls in this example screen and follow the numbered instructions above.